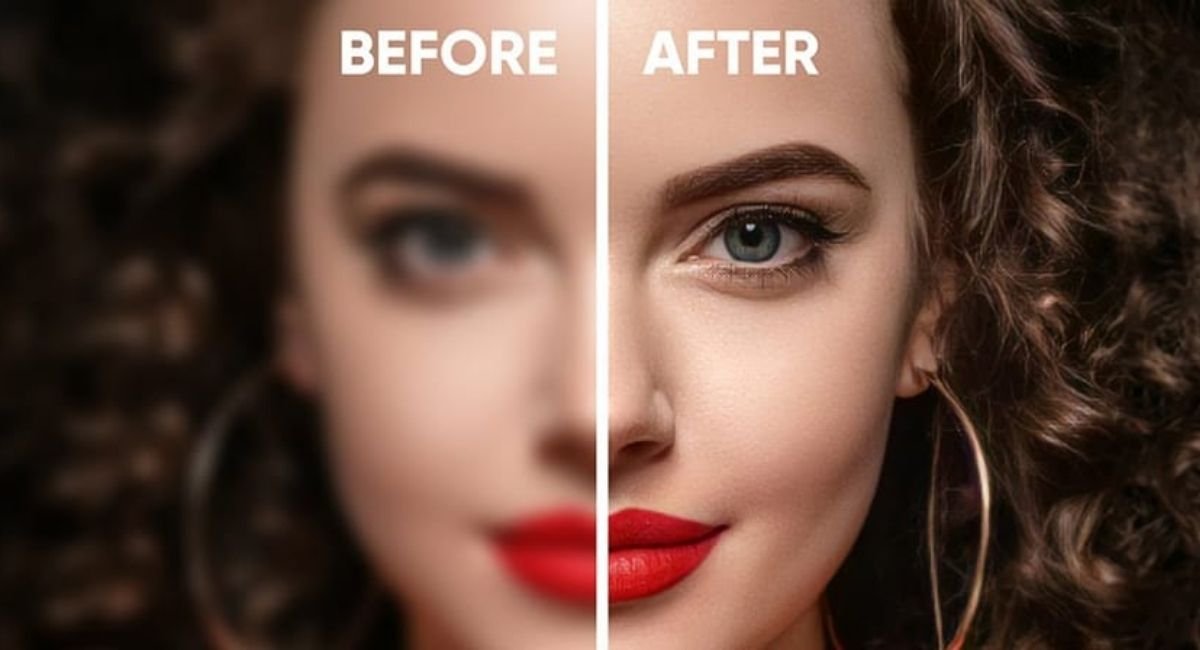
Fuzzy or blurry photos can quietly damage the impact of your content. Whether you are running a blog, managing website pages, sharing images on social media, or editing personal photos, unclear images immediately reduce trust and readability. Many people assume fuzzy photos are “just bad images,” but in reality, most issues are easy to fix once you understand what causes them.
Images play a major role in how users consume content. Poor image clarity affects website visitors’ readability, weakens visual content strategy, and makes even good content feel unprofessional. The good news is that you don’t need to be a designer to fix fuzzy photos. With the right approach, tools, and settings, you can restore clarity on almost any device.
This guide explains why images look fuzzy, how to fix blurry images on Windows, Mac, mobile phones, and Photoshop, and how to prevent these issues in the future.
What Causes Photos to Look Fuzzy or Blurry?
Fuzzy photos usually happen due to technical mistakes rather than poor photography skills. One of the most common reasons is improper image sizing. When images are uploaded to websites or blogs at the wrong size, the platform may stretch or compress them automatically. This causes pixelated images and loss of sharpness.
Another major cause is image upload compression. Many websites reduce image file size to improve loading speed. While this helps performance, aggressive compression often lowers image quality. This is why website images appear blurry after upload, even if they looked fine on your computer.
Low resolution images are another issue. Images taken from screenshots, messaging apps, or social platforms often have reduced resolution. When reused for blogs or website pages, they look fuzzy, especially on large screens.
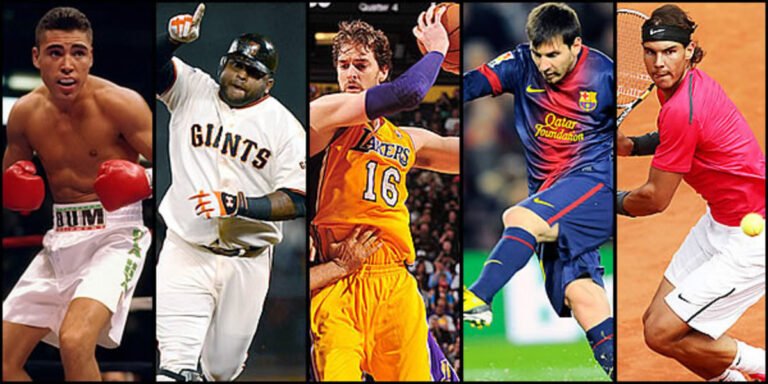
Motion blur photos are common in sports and action shots. A slow shutter speed or subject movement results in blurry sports photos that feel impossible to fix later. Similarly, camera shake, poor lighting, or incorrect focus can soften details.
Sometimes, the problem is deeper. Image file corruption can cause random blur, grain, or pixel damage. In these cases, normal photo editing tools may not work, and photo repair software becomes necessary.
Difference Between Fuzzy, Blurry, and Out-of-Focus Images
Many people use “fuzzy” and “blurry” interchangeably, but they are not the same. Understanding the difference helps you choose the right fix.
Fuzzy images usually come from resizing issues, compression, or low resolution. The image feels soft overall, especially around text or edges. Blog images quality issues often fall into this category.
Blurry images usually result from motion or camera shake. Motion blur photos show streaks or softness in one direction. These are common in sports photography and low-light situations.
Out-of-focus images happen when the camera focuses on the wrong subject or background. The blur feels smooth and natural but affects the main subject instead of the edges.
Each issue needs a slightly different approach. Image clarity improvement for fuzzy photos focuses on sharpening and resizing. Motion blur prevention is more about camera settings, while out-of-focus images have limited recovery options.
| Image Format | Best Use Case | Quality Level | File Size |
|---|---|---|---|
| JPEG | Blog photos, featured images | Good | Medium |
| PNG | Text images, graphics | High | Large |
| WebP | Modern websites | High | Small |
| RAW | Professional photography | Very High | Very Large |
Quick Checks Before Fixing a Fuzzy Photo
Before you start editing, take a moment to check a few things. Many image problems can be fixed without heavy editing.
First, check the original image size. If the image looks fuzzy after upload, compare it with the original file. If the original is sharp, the issue is likely image resizing or compression by your website.
Next, check the display size. Images stretched beyond their original dimensions will always look blurry. This is one of the most common blog images quality issues.
Check file format. JPEG images lose quality faster with repeated edits, while PNG images handle text on images clarity better. RAW vs JPEG images also matter. RAW files preserve more detail and are easier to fix later.
Also, view the image on different screens. Sometimes the blur is more noticeable on high-resolution displays, making it feel worse than it actually is.
How to Fix Fuzzy Photos on Windows and Mac
If you want a simple solution, both Windows and Mac offer built-in photo editing tools that work surprisingly well.
On Windows, open the image in the Photos app. Click the Edit option and open the adjustment panel. Use image sharpness sliders carefully. Small changes make a big difference. Increasing clarity too much can introduce noise reduction issues or halos around edges.
You can also use filters to enhance contrast and sharpness. This helps clear blurry pictures caused by light compression or resizing problems. Always preview and save a copy instead of overwriting the original.
On Mac, open the image in Apple’s Photos app. Click Edit, then Adjust. Use the Sharpen tool slowly, focusing on definition rather than extreme sharpness. The Photos app also allows noise reduction, which helps clean up grainy areas without making the image look artificial.
These tools are perfect for quick fixes and are often enough for website image optimization when the blur is minor.
How to Fix Fuzzy Photos Using Photoshop (Step-by-Step)
Photoshop offers the most control when fixing fuzzy photos. It is ideal for professional results, especially when image clarity is critical.
Start by opening your image in Photoshop. Duplicate the layer so you can work non-destructively. One of the most effective tools is the Unsharp Mask filter. Go to Filter, then Sharpen, and choose Unsharp Mask. Adjust the amount, radius, and threshold slowly. Every image is different, so avoid preset values.
The High Pass filter is another powerful method. Duplicate the layer, apply the High Pass filter, and change the blend mode to Overlay or Soft Light. This sharpens edges without affecting the entire image.
Photoshop AI tools can help with more complex tasks. Features like the Remove Background tool and Select and Mask feature are useful when blur affects specific areas. Pen Tool refinement and clipping path technique allow precise control over edges, especially for product or sports images.
For fuzzy photos caused by compression, combining sharpening with noise reduction gives the best result. Always zoom in while editing to avoid overprocessing.
How to Fix Fuzzy Photos on iPhone and Android
Mobile photo editing apps have improved a lot in recent years. You can now fix fuzzy photos directly on your phone.
On Android, Google Photos offers a built-in sharpen tool. Open the image, tap Edit, then Adjust. Increase sharpness gradually. Avoid pushing it too far, as it can exaggerate artifacts from compression.
On iPhone, the Photos app editing tools work similarly. Use sharpness, contrast, and clarity controls together for balanced results. Minor adjustments often restore image quality enough for social media or blog use.
Third-party mobile photo editing apps provide advanced controls, but built-in tools are usually sufficient for everyday fixes.
How to Fix Extremely or Completely Blurry Photos
Some images are heavily blurred due to motion, poor focus, or damage. These are the hardest to fix.
For motion blur photos, Photoshop offers Shake Reduction, but results vary. It works best when blur direction is consistent. Completely blurry images may not be fully recoverable, but partial improvement is possible.
If blur is caused by image file corruption, normal editing will not help. In such cases, Stellar Photo Repair or similar photo repair software can recover damaged image data. These tools allow you to upload multiple files, preview results, and save repaired images.
For extremely blurry sports photos, recovery depends on how much detail exists in the original file. RAW images offer more flexibility than JPEGs.
How to Sharpen Only a Specific Area of a Photo
Sometimes only part of the image is blurry. In these cases, selective sharpening works best.
In Photoshop, use Select and Mask feature to isolate the subject. Apply sharpening only to that area using layer mask in Photoshop. Pen Tool refinement helps create clean edges, especially around hair or detailed objects.
The Background Eraser Tool is useful when blur appears around hair or complex edges. This method keeps the background smooth while enhancing the subject.
Selective sharpening improves image clarity without making the entire photo look unnatural.
Best Tools and Software to Fix Fuzzy Photos Automatically
Not everyone wants to edit manually. Automatic tools are helpful for bulk image fixing.
Desktop photo editing tools like Photoshop remain the most powerful, but simpler software and online tools can sharpen images online quickly. Some tools use AI to analyze image quality and apply smart sharpening.
Photo repair software is essential when dealing with corrupted images. Tools like Stellar Photo Repair allow preview and save options, making them safe for important files.
Mobile photo editing apps also offer automatic enhancements, which are useful for fast workflows.
Proven Tips to Prevent Fuzzy Photos in the Future
Prevention is always better than fixing. Start with correct image sizing before upload. Avoid stretching images beyond their original resolution.
Use proper image optimization for websites. Compress images carefully without sacrificing quality. Choose formats wisely based on content type.
For photography, use fast shutter speed to prevent motion blur. Good lighting reduces camera shake and improves focus accuracy. Shooting in RAW instead of JPEG gives more room for correction later.
Follow blogging image standards and maintain consistency across your website. Clear images improve trust, readability, and user experience.
TRENDY INFO
Table 1: Common Reasons for Fuzzy Photos & Their Fix
| Cause of Fuzzy Photos | Why It Happens | Simple Fix |
|---|---|---|
| Improper image sizing | Image ko stretch kar diya jata hai | Upload se pehle correct dimensions use karein |
| Image compression | Website auto compression karti hai | High-quality compression tools use karein |
| Low resolution images | Small image ko large area mein use kiya | High-resolution image upload karein |
| Motion blur | Camera ya subject move ho jata hai | Faster shutter speed use karein |
| Focus issue | Camera ne galat area par focus kiya | Proper focus aur lighting ensure karein |


Loved the layout today; clean, simple, and genuinely user-friendly overall. Your article helped me a lot, is there any more related content? Thanks!